I took a vacation day today to get caught up on some chores around the house and work on the band saw for a little while.
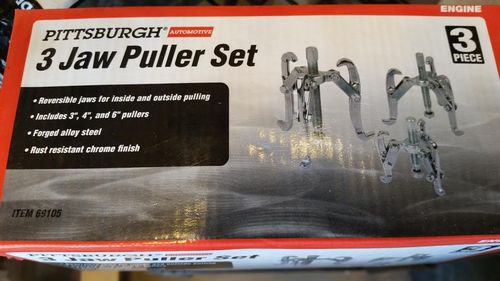
I had some difficulty removing the “wheel side” bearing from the shaft. I picked up a set of 3-jaw gear pullers from Harbor Freight for $20 yesterday to do the job. I used the middle-sized set of the three and the bearing came off without difficulty using this method. That was the last step of disassembly.
I am not planning on doing some immaculate restoration. I just don’t have time. I am planning to take most of the parts off and give them a squirt of WD-40 and hit them with a scouring pad, steel wool or wire brush (or some combination of these) to get the bulk of the grit and muck off before reassembly. So my parts aren’t going to look shiny and new, but they will be cleaner than they are now. Also, since this machine has been in Arizona for quite some time, there is very little rust. So it is mostly a matter of cleaning up sawdust and some of the oily, dirty grime that just tends to build up over time.
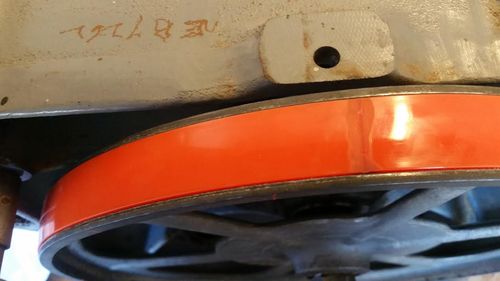
It wasn’t rocket science to put it back together. Putting the new tire on was a bit of a trick. I’ve heard boiling the tires in water is helpful, but I just put it on, tried to stretch it a little as I went and used zip-ties to hold it in place as I worked around the wheel. There are plenty of videos and other threads on how to do this, so I won’t get into it here. I was surprised to see a seam. I was under the impression that the urethane tires were seamless.
I cleaned out the holes (wheel and pulley sides) in the cast-iron frame where the bearings seat with a little 3 in 1 oil and a scouring pad, then wiped it out with a paper towel. I put the spring washers on the shaft, followed by the “pulley-side” bearing, then the nut. This feeds through the pulley side with an empty shaft sticking out on the “wheel-side”. The bearings are a very snug fit, so they must be fed into the hole in the band saw frame very straight and evenly. The slightest angle will cause it to get stuck. I found that giving the bearing a little twist as I pushed it in helped balance out any angle I was accidentally introducing into the fit. Once in place it could move in and out a little, but there was no play in it at all. The spring washers will push it out a little but it should stay put.
Putting the wheel back on was probably the hardest part. I had trouble getting the Hy-Pro key fitted into the slot. It kept popping up when I’d try to push the wheel into place. I can’t offer much insight/tricks on this. It was a lot of trial and error. I used a flashlight and a small mirror I have (like a dental mirror that’s bout 2” in diameter) to help see when/where things were lining up and that seemed to be what I needed to get it done.
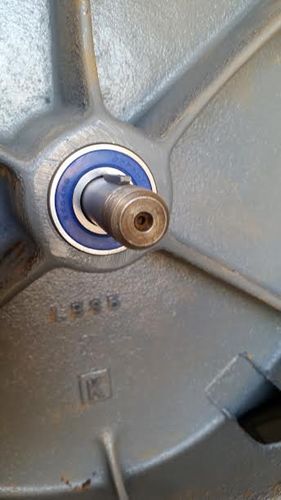
(Edited to update the following: Something had haunted me about the instructions included from Iturra on installing this lower wheel and bearings. There was mention of these shims that needed to be used depending on the age of the saw / type of bearings being replaced. The instructions on these shims was a little confusing. I had to read it four or five times before finally deciding that I needed to be using the shims on my saw. The short version of this is that there is something called an “extended inner race” that was used on the bearings for older band saws. That means one face of the bearing sticks out while the other face is flush. The bearings Iturra sent were flush and the instructions indicated that if you were replacing bearings with the “extended inner race” (bearings that have one face that sticks out) you need to use the shim. The shim goes between the bearing and the wheel on the wheel-side bearing. As best as I can tell, the pulley side bearing doesn’t require a shim (no shim was included to use anyway). There was a second shim included, but it is too small for the lower wheel shaft. I believe this is for one of the thrust bearings.)
Next I decided to take off the table and trunnion assembly to clean them up and get the lower thrust bearing installed.
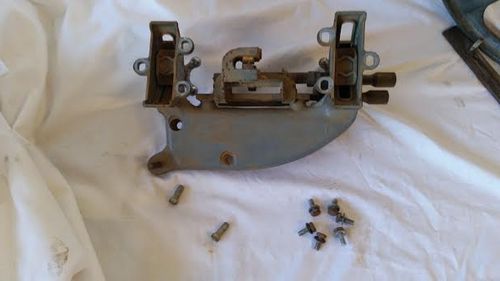
The table has 3 screws on each trunnion (mine were 3/8 heads). 4 these 6 screws are pretty accessible but the other two are trickier. I was able to just use the trunnion to tilt the table up allowing better access to these screws. Fortunately they weren’t rusted in place, as even with the table tilted, access was not great and it would’ve been difficult to remove the screws if they had been more stubborn. The bolt that is circled in red below was the least accessible (the other tricky one is it’s counterpart on the other trunnion). I recommend removing these two tricky ones first so you can level the table again before removing the others. This will prevent the possibility of the table sliding off of the trunnions and falling on the floor when the last screw is removed.
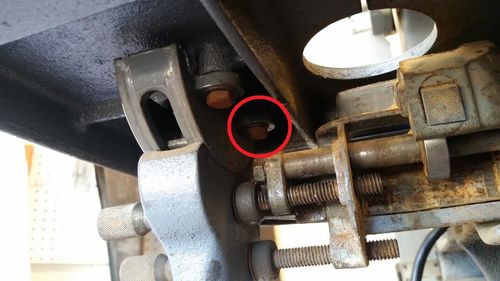
Below are pictured the 6 screws that held the table on, the trunion supports and the 2 screws that hold the trunnion supports to the main frame of the band saw. These two screws are accessible from the top and are flat-head. This is by far the rustiest bit of business in the entire saw.
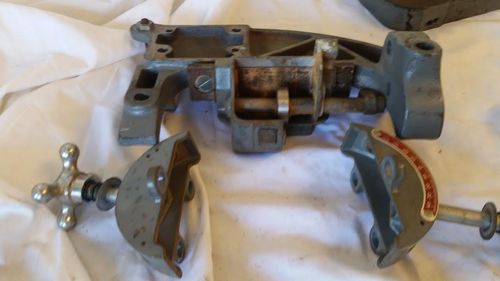
I took all the bits and pieces apart on the trunnion assembly and cleaned the screw threads with WD-40 and a wire brush. I scoured everything else to get the rust/muck off. You can see the knobs for adjusting the trunnion are in good shape. They didn’t need much cleaning up at all. This photo is primarily a reference for how these handles fit back together.
The lower thrust bearing was stuck in place. I removed the nut that holds the shaft for this bearing in place and this shaft slides pretty freely within the assembly that houses it. But I couldn’t get the bearing to budge.
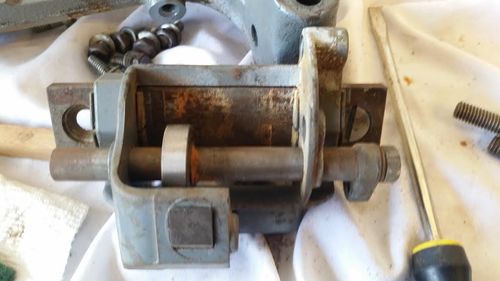
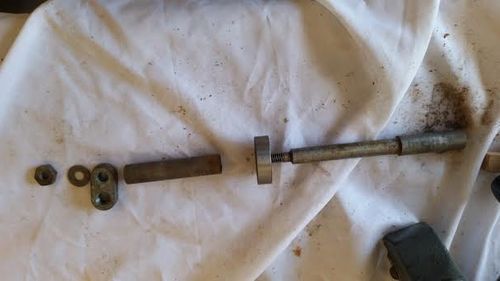
There is a sleeve that goes over this screw that wedges the bearing in place, so that need to be removed first. I was able to tap it out (by tapping the threaded end with a small rubber mallet). This jarred the sleeve loose, but the bearing was still stuck. Further tapping and pulling managed to get this free with some effort (FYI, the replacement bearing went on extremely easily).
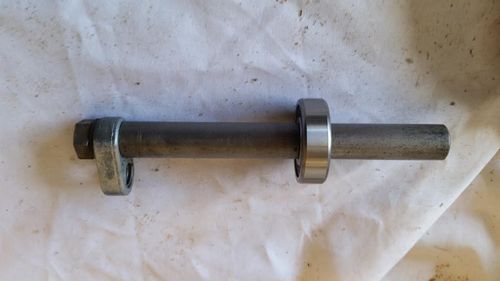
Below, left to right: nut, washer, mounting bracket, sleeve, bearing, shaft. The bearing slides onto left side of shaft and wedges against thicker, right side of shaft. Sleeve fits over all of this and nut/bracket wedge it all together.
And below is the thrust bearing assembly cleaned up and reassembled (I will need to take it apart again to install it).
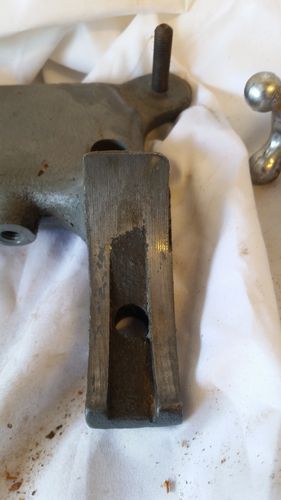
That is as far as I’ve made it today. Not sure if I’ll get any further, so will end this post now. I do have one concern. I’m going to start a thread on this on the main power tool forum. The one trunnion support appears to have been ground away over time. I have no idea if this is how it should look or not. So am going to ask on the forum to see if I need to get this replaced or not.
Edit with update:
Brad has responded to my thread on this trunnion support and said that it looks good, so nothing to worry about here.